Art has become one of the most versatile and commonly used words used to describe forms of aesthetic appeal. It’s associated with things that are aligned, unaligned, proportionate, skewed, beautiful, and even disturbing; all of these traits aside, art has one definitive aspect: effectiveness. The goal is to make an impression, describe something that cannot be communicated in any other way, make the audience feel something incredible, and discover something new. Some have argued that art is an accident ordained by the Gods using the hand of mortals, others toil feverishly to perfect every last inch of whatever piece they have created, leaving no room for debate or Godly help; either way the “effectiveness” is there, taking just as many forms as it always did, and grasping just as many minds. So there in lays the newest, ancient, issue argued by artists, theorists and philosophers alike: Has technology tainted or enlightened art as a whole? Since art is an ambiguous term, the issue will prove to be a long standing and well established debate between knowledgeable, credible individuals.
Photography is an interesting form of artistic expression because of its vast difference from what most would call “fine art.” Photography began in the 1820’s with the very first photograph being taken by Niépce, who joined forces with Louis Daguerre in developing the details of their project, entitled, the “Daguerreotype.”
Some people found the technology fascinating and as an opportunity to seize their chunk of a new innovation, since this new process of creating still life, long lasting images of things required no skill in drawing or painting. But, others with already existing artistic skills found the Daguerreotype threatening, and lacking of a true creative nature. Somehow, in between an exact portrait and an exact photograph, art found a home over, under and through both of these mediums. There is no debate today, for photography has established itself as a worthy form of artistic expression; effective no less than a painting or a sculpture.
Can Digital Photography be…Photography?
Most people became instantly enthralled with the idea of a Digital Camera because being able to see the picture before you take it is really “cool.” Let’s face it, humans are gluttons to the technology industry, biting off more than we can chew and chewing more than we can taste. But, photographers think of Digital Photography in a very different way. Just as portrait painters thought back in 1826: Will this new invention end my career as an artist?
Out of the Dark room and into the light?
The discussion is not whether or not Digital cameras should replace film; that is typically a matter of preference and purpose. Digital photography brings up issues that are far more enduring, issues that are not as simple to resolve. With Digital Photography, the concept of a true dark room is eliminated, and in its place: photo manipulation software. Whether you’re an amateur and you use the free photo suite program thrown in with your camera, or whether you’re a pro who use the latest most comprehensive techniques; there is no contest that the Digital tools allow more control over the final product.
This is considered a good thing, right? From an onlookers stand point, yes it is. But for an artist who specializes in the dark room and the techniques of film photography, these new innovations might prove to eliminate the essence of one’s specialization.
The art of photography relies heavily on the element of surprise, spontaneity, and sometimes even accident. Within a photo lies one single instance, possibly only existing for the one hundredth of a second that it took the camera to flash over the scene. Any experienced photographer will tell you that it is important to take as many pictures as possible to hopefully find that beautiful gem of a moment surrounded by other similar, but ordinary seconds of time. Digital technology now allows complete control over those sacred moments, and even opportunity to edit the photograph afterwards, possibly creating these moments, virtually. Has the accident of photography been one up-ed? Or has the true livelihood of photography been demolished and in its place something, too new?
Digital art and photography seem to be the reincarnation of what portrait painting was to original photography. In it lays a new sense of control and exact ability; much more like the control of paint on canvas, but much less like the well established medium, photography.
But, even paint on canvas can be controlled digitally. Using common illustration software such as creol draw, adobe illustrator, Maya, and many more, you can actually paint an entire oil painting using only an electronic pen hooked up to a pad. When things like painting and photography seem to define the entire realm of the art industry, the idea of a Digital tool doing these things more efficiently seems awfully overwhelming for a fine artist. So, herein lies the problem. As I said, this will be a long standing and worthy debate, but never effectual enough to take the true effect from any medium or form of art.
It is safe to say that art is not a win lose game, where one medium has the ability to “beat” another. No matter how similar Digital Photography and Photography seem to be, they are very different in their approaches and in their final outcome. Today, comparing a Portrait to a photograph is like comparing apples to oranges. They may look similar, but they taste, feel, are something very, very different. Art is a matter of expression, and there are infinite numbers of ways to express.
When art is approached in a different way, it is only progress; art is timeless and doesn’t fade away with the latest trend. It has been proven through the ages that art will change, and new styles of artistic expression only enhance the industry as a whole. The camera did not eliminate realistic painting, and technology will not eliminate the traditions of fine art.
Wednesday, March 16, 2011
A Brief Evolution of Art and the Influence of Technology on Photography
Art Box: A Great Way to Get Creative with Children
You've had it! If you hear, "I'm bored. What can I do? There's nothing to do!" or one more whine you'll surely put your head in the dryer and slam the door shut! Keeping kids occupied challenges the most stalwart of adults. Let's face it; we're no match for the leprechaun like stealth of the half-pint human who exhibits no shame while in pursuit of getting what they want. In this case, the want is something to do! Take a deep breath and grab the art box. Aren't you glad you planned for just this kind of rainy, I'm bored day?
The art box is alive with fun projects for little fingers and minds. The key to creating this mother's little helper is to keep it fresh and growing. First you'll need a box. Find a fascinating box, either plastic, heavy cardboard, or a Rubbermaid container. Make sure it's colorful, big and fun. After all, this is a special box, not you're ordinary run of the mill type of box filled with just paper and crayons. The art box I pulled together is a plastic one in primary colors of red, blue and yellow with a snap on lid and a carrying handle. It cost about $5.00 at a big box store.
Once you've found the perfect box you can begin filling it. There's no need to fill it all at once. The idea is to start with the basics: construction paper in lots of colors, crayons, markers, scissors, glue, and a sketchpad. These items can be varied depending on the age of the child. Washable markers are a good idea for the younger set along with small, scissors with rounded ends. Add to the box periodically so when it's opened there's something new inside. Play dough makes a great addition. Forget the molds and the fancy tools. Let the children just use their hands and imagination to create whimsical masterpieces. Toss in stickers from time to time, especially for upcoming holidays. Paints of all kinds can be added. Start with watercolors. Move on to tempra for the older kids, but always have finger paints for the little ones. Sidewalk chalk is a big hit in the summer and in the winter it can be used on large newspaper print. You can usually get the end rolls free or for a nominal fee from newspaper publishers.
Think out of the "box" when coming up with new ideas. Collect little treasures when out walking. Botanicals like small pinecones, straw flowers, dried grasses or try your hand at pressing flowers with your wee ones. These can be glued on to paper to make wonderful nature pictures. Tiny shells and sea glass collected from a trip to the beach will surprise and delight when the box is opened. Glitter, pieces of fabric in bright colors, ribbons and rickrack all get the creative juices flowing. At some point you'll want to add colored pencils, stencils, and a handy dandy ruler. A compass or protractor for the older children will acquaint them with these items as well as aid in the artful creativity that makes children everywhere smile. (At least for a while.)
Keep a look out for unusual items that you can add to the art box. Purchase various colors of tissue paper for paper flowers and roses or to be used in whatever way your child comes up with. Petal paper is a very special paper that is made with bits and pieces of flower petals, grasses and other gifts from nature. It's a bit pricey, but what a treat for the older children.
The more fascinating the items the children find in the box, the more special it becomes. Look around your home. You'll find items that make for interesting art projects like: cotton balls, colorful pastas, sponges, buttons of every size and hue, dryer lint (?) I was just kidding on that one. Keep a good supply of stickers of all kinds on hand to add when nothing else is available
The true key to the "special" box is to have little surprises inside that were not there the last time it was brought down from it's safe spot. This is not the everyday color jar filled with broken bits of crayons; this box is brought out when things become really dire. It's a "special" art box. The special box is only used at the table or easel. No preschoolers are allowed to take one item from the box and walk around with it. Again, the idea is to make it so special that it brings excitement and smiles to the faces of the bored and fretting. It's worked for me and I'm sure it will work for you as well. So get crackin' you never know when the clouds might appear on the horizon or your child's face. As adults, we seriously need all the help we can get. The special art box will give you a moment or if you're lucky, two or three to take a deep cleansing breath. Just look at their cherubic faces. "NOOO don't paint the cat!!!"
Primer: Perhaps the Smartest Sci-Fi Film of All Time

here
If your all time favorite science-fiction movie stars California’s governor, please stop reading this review now. Still here? Good because in all likelihood you have not heard of Primer, a newly released DVD from Shane Carruth. This film is a must see for any serious sci-fi fan or for that matter any serious connoisseur of fine independent cinema. This intellectually challenging movie was made for just $7,000.00 in the summer of 2001. That was one fantastic investment since it earned more than $425,000.00 in a limited theatrical run and won the 2004 Sundance Film Festival Grand Jury Prize. The film tells the story of Abe (David Sullivan) and Aaron (Carruth), two young, hard working, and ambitious engineers, who spend their evenings and weekends trying to become the next Steve Jobs and Steven Wozniak (the founders of Apple Computer for the trivia challenged) by creating and patenting new inventions in Aaron’s garage. While fine tuning one of these inventions, a machine which can counteract gravity, lowering an item’s apparent mass, the boys inadvertently discover that their device has some, well, unexpected capabilities too. Being careful not to spoil the story, it is fair to say that one of these capabilities seemingly allows Abe and Aaron to do just about anything they want and earn a ton of money in the process. From there the film looks at how absolute power affects the duo and examines how they deal with the consequences of their actions. To put it mildly, their lives change in unexpected and astounding ways. The plot is complex and void of exploding cars, supermodels dressed like hookers, and most of the normal Hollywood fare, in other words it is well written, if not a bit ambitious considering that many moviegoers will be challenged. The film is visually interesting, intense, and image driven. Viewers will find it hard to believe that much of the movie was filmed at Carruth’s parent’s house and a U-haul storage center. Almost a complex as this fine film’s story line, is the story of just how this movie was made. Carruth, who is math geek, wrote, directed, filmed, stared in, edited, and scored the movie. Carruth had worked at three engineering-oriented companies, but hated it. Then turned to writing short stories and novels, but soon realized that was not for him either. Eventually, Carruth hit on the idea of becoming a filmmaker. It didn’t seem to matter that he did not have the least idea about how movies were made. Carruth had very little money to invest in his new career, so Primer was made on a real shoe-string budget, but you wouldn’t know it from watching the movie, which looks every bit as good as major movies that can cost millions of dollars. In fact, Carruth’s tiny budget forced him to be creative, it almost makes you wonder if Hollywood should try forcing more filmmakers to be creative. The bottom line is that this PG-13 rated (for brief language) film is an excellent example of modern cinema well worth watching.
Sunday, February 27, 2011
Using Depth of Field for Photography
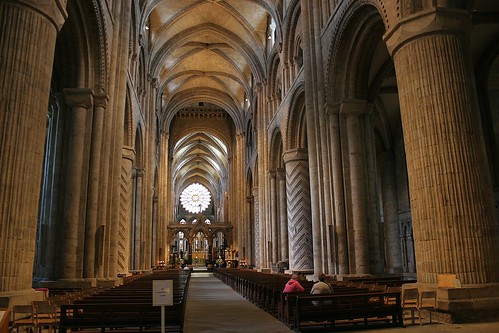
Photo Credit: celtics baby clothes
It's one of the greatest tools available to photographers, it's easy to use, and yet it's among the least known and used abilities of a camera today. Pro photographers have used it for decades, but the amateur can use these same techniques without paying the professional price. It's called depth of field, and it's accessed through the use of the aperture.
The aperture, simply put, is the hole that light comes through in your camera. Light passes through the front of the lens, through a series of glass pieces, through a hole at the back of the lens, and into the camera. The aperture is the hole in the back of the lens, and you get to control this vital part of the camera, if you decide to want to bump up your pictures. You can place the camera on auto, and the camera will adjust its aperture, shutter and more to the situation it sees. By placing the camera in more manual modes, you take on powerful and personal control, and YOU get to decide what you want to create with your photographs.
An important factor here is lighting. Any photography relies heavily on the lighting that you are using, whether it be from the natural, ambient light around you, or artificial light, like a strobe or other flash unit. Especially while using natural light, it will be important to use a tripod to keep the camera steady while shooting. If you are shooting on a cloudy day, without much light, then the camera must compensate for less light by having a longer shutter speed, which it will do automatically in the mode I'll be explaining in a moment. A longer shutter speed means the camera won't be able to have a clearly focused picture without the use of the tripod.
Depth of field simply means the area of focus, or the area in the picture that is in focus might be a more accurate term. Photography is a two dimensional medium, having height and width, but it lacks depth, the third dimension. Your photography can create the illusion of that depth through a few easy camera settings. You may be asking yourself, why would I want to create the illusion of depth, and what is it good for? Part of the reason is to create a sense of emphasis. When you take a picture of a large area, with trees, birds, squirrels, people, rocks, etc, what is the thing or object that you are zeroing in on? Is there anything that you really want to emphasize to your viewer? If so, it's probably getting lost in the crowd of other things on the scene. The squirrels are so small you can barely see them, the people are walking their dogs, and the trees are swaying in the breeze. But what if you wanted to focus on the viewer on the flowers in the garden? When you create emphasis on an object, it strengthens your photo, and actually guides the eye of the viewer to that object. You could take pictures to create a story about that, as you can read in my article about photo stories. When you get in to take close-ups of the flowers is where the possibilities of great photography begin.
Emphasize the garden by focusing in on one or two flowers at a time. Grab a tripod, get down to eye level with them, and then get ready. Place your camera in a mode that allows you to change your aperture; the mode is usually called "A", or "AV" on some models. Film cameras can allow these changes too, on SLR models. They require you to simply change the f-stop manually on the aperture ring. On your digital camera, use your selector buttons to change your aperture. You'll see on your digital camera, most likely, a letter f, with the number on the readout on either the monitor, or the info panel on the top of the camera, or perhaps both areas. The f means f-stop, which is the name commonly used to describe the number of the aperture setting. The best way to emphasize a flower is to have only that flower in focus, and to have the rest out of focus. Change your aperture to a really low number, such as 2.8, 4, or 5.6. When the lens is at a low number like this, the lens hole is wide open, but it is creating a small area or depth of field; basically an inch or two will be in focus. Focus your camera, and shoot. Now, look at the camera, and look at your pictures. The one or two flowers should be in focus, but do you see how the background is fuzzy and out of focus? This is what is called a "shallow depth of field", and that comes from using a small number f-stop. That's because you've taken control of your camera, and changed the outcome! Because only the flower is in focus, and the rest is blurred out, you have guided your viewer to what YOU want to emphasize! You have used one of the most powerful tools available for a photographer to bring a new focus to your pictures. Try this with a lot of different scenes; look how the item is forced to really stand out for you because it's the only thing in focus.
Now, on the opposite end of the spectrum are the pictures that have the entire photograph in focus; such as a lighthouse standing out from the beach, with horseshoe crab shells in the immediate foreground. This is also done by changing the depth of field of your camera. Here, you again change your aperture, but this time place it on a high number like 16, 22, 28, etc. This is to create a large depth of field by using a small hole in the back of the lens. Again, you must use a tripod to keep the camera steady. Take a picture with something in the near foreground, such as a rock or the crab shells, and then compose your picture with a mountain or some other object some distance away, focus, and shoot. Remember to use the rule of thirds here for additional emphasis. As you'll see, both areas should be in focus, again showing the third dimension and creating the illusion of depth. This is a large depth of field.
It's a little known tool in the photographer's toolbox, but almost any camera made in the past four years will have some sort of ability to work with depth of field, whether they have a point and shoot or DSLR. Every photographer, of every level, has the ability, through practice, to create beautiful photographs that can rival those of the pros, by using the tools available with every camera. Use the strength of depth of field when you create the third dimension in your photographs, and add a new and incredibly
powerful personal dimension to your photography.
Using Depth of Field for Photography
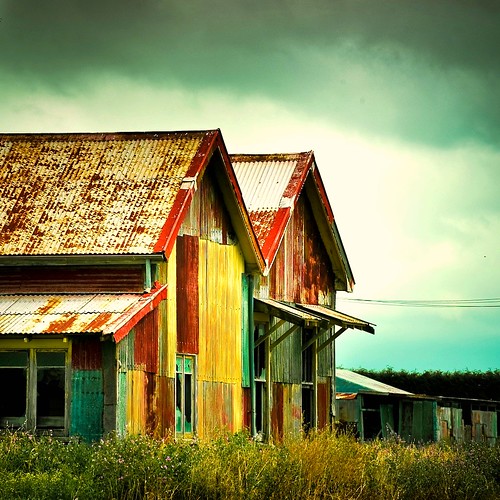
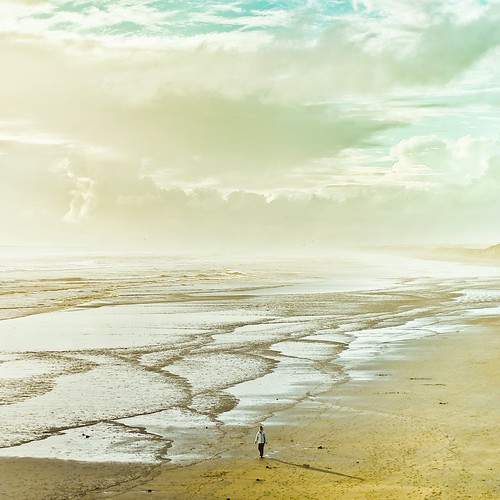
photo source
It's one of the greatest tools available to photographers, it's easy to use, and yet it's among the least known and used abilities of a camera today. Pro photographers have used it for decades, but the amateur can use these same techniques without paying the professional price. It's called depth of field, and it's accessed through the use of the aperture.
The aperture, simply put, is the hole that light comes through in your camera. Light passes through the front of the lens, through a series of glass pieces, through a hole at the back of the lens, and into the camera. The aperture is the hole in the back of the lens, and you get to control this vital part of the camera, if you decide to want to bump up your pictures. You can place the camera on auto, and the camera will adjust its aperture, shutter and more to the situation it sees. By placing the camera in more manual modes, you take on powerful and personal control, and YOU get to decide what you want to create with your photographs.
An important factor here is lighting. Any photography relies heavily on the lighting that you are using, whether it be from the natural, ambient light around you, or artificial light, like a strobe or other flash unit. Especially while using natural light, it will be important to use a tripod to keep the camera steady while shooting. If you are shooting on a cloudy day, without much light, then the camera must compensate for less light by having a longer shutter speed, which it will do automatically in the mode I'll be explaining in a moment. A longer shutter speed means the camera won't be able to have a clearly focused picture without the use of the tripod.
Depth of field simply means the area of focus, or the area in the picture that is in focus might be a more accurate term. Photography is a two dimensional medium, having height and width, but it lacks depth, the third dimension. Your photography can create the illusion of that depth through a few easy camera settings. You may be asking yourself, why would I want to create the illusion of depth, and what is it good for? Part of the reason is to create a sense of emphasis. When you take a picture of a large area, with trees, birds, squirrels, people, rocks, etc, what is the thing or object that you are zeroing in on? Is there anything that you really want to emphasize to your viewer? If so, it's probably getting lost in the crowd of other things on the scene. The squirrels are so small you can barely see them, the people are walking their dogs, and the trees are swaying in the breeze. But what if you wanted to focus on the viewer on the flowers in the garden? When you create emphasis on an object, it strengthens your photo, and actually guides the eye of the viewer to that object. You could take pictures to create a story about that, as you can read in my article about photo stories. When you get in to take close-ups of the flowers is where the possibilities of great photography begin.
Emphasize the garden by focusing in on one or two flowers at a time. Grab a tripod, get down to eye level with them, and then get ready. Place your camera in a mode that allows you to change your aperture; the mode is usually called "A", or "AV" on some models. Film cameras can allow these changes too, on SLR models. They require you to simply change the f-stop manually on the aperture ring. On your digital camera, use your selector buttons to change your aperture. You'll see on your digital camera, most likely, a letter f, with the number on the readout on either the monitor, or the info panel on the top of the camera, or perhaps both areas. The f means f-stop, which is the name commonly used to describe the number of the aperture setting. The best way to emphasize a flower is to have only that flower in focus, and to have the rest out of focus. Change your aperture to a really low number, such as 2.8, 4, or 5.6. When the lens is at a low number like this, the lens hole is wide open, but it is creating a small area or depth of field; basically an inch or two will be in focus. Focus your camera, and shoot. Now, look at the camera, and look at your pictures. The one or two flowers should be in focus, but do you see how the background is fuzzy and out of focus? This is what is called a "shallow depth of field", and that comes from using a small number f-stop. That's because you've taken control of your camera, and changed the outcome! Because only the flower is in focus, and the rest is blurred out, you have guided your viewer to what YOU want to emphasize! You have used one of the most powerful tools available for a photographer to bring a new focus to your pictures. Try this with a lot of different scenes; look how the item is forced to really stand out for you because it's the only thing in focus.
Now, on the opposite end of the spectrum are the pictures that have the entire photograph in focus; such as a lighthouse standing out from the beach, with horseshoe crab shells in the immediate foreground. This is also done by changing the depth of field of your camera. Here, you again change your aperture, but this time place it on a high number like 16, 22, 28, etc. This is to create a large depth of field by using a small hole in the back of the lens. Again, you must use a tripod to keep the camera steady. Take a picture with something in the near foreground, such as a rock or the crab shells, and then compose your picture with a mountain or some other object some distance away, focus, and shoot. Remember to use the rule of thirds here for additional emphasis. As you'll see, both areas should be in focus, again showing the third dimension and creating the illusion of depth. This is a large depth of field.
It's a little known tool in the photographer's toolbox, but almost any camera made in the past four years will have some sort of ability to work with depth of field, whether they have a point and shoot or DSLR. Every photographer, of every level, has the ability, through practice, to create beautiful photographs that can rival those of the pros, by using the tools available with every camera. Use the strength of depth of field when you create the third dimension in your photographs, and add a new and incredibly
powerful personal dimension to your photography.
Saturday, February 26, 2011
Boppy Pillow Photography Prop
source,photo credit
Photography props are expensive and many times are not even worth the investment. A Boppy Pillow however, even if bought at full price, is well worth the investment. You will get years of use from your Boppy Pillow and as a photography prop the Boppy Pillow can be used for babies and pets. The Boppy Pillow is also washable so it can be cleaned inbetween uses. You can purchase Boppy Pillows new at stores such as Target or used at resale shops and rummage sales.
Boppy Pillow Photography Prop Pose #1: Baby On Back
Place the Boppy Pillow on the floor of coffee table or other raised surface, not to high since you will be photographing from above. Cover the Boppy Pillow with a backdrop, blanket, material, etc. Gently rest the upper body of the baby on the Boppy Pillow, the baby's bottom should be near the open end. This position is perfect for newborns that can not support themselves.
Boppy Pillow Photography Pose #2: Baby on Tummy
Prepare the Boppy Pillow as above on a raised surface. For this pose the table can be high or low since you will be photographing from in front of the baby. For this photography pose you will be facing the open end of the Boppy Pillow away from the camera. This pose does require some upper body strength so it works best for babies 2 months and up. Place the baby stomach down with the upper body resting slightly forward of the Boppy Pillow. You now have a perfect head and shoulders position.
Boppy Pillow Photography Pose #3: Baby Sitting
Prepare the Boppy Pillow as described in pose 1. As in pose 2 the raised surface can be high or low since you will be photographing from in front of the baby. The Boppy Pillow opening should be facing the camera. Sit the baby inside the hole with the baby's legs coming out the opening. The Boppy Pillow will help support babies that can sit unassisted. In this pose the Boppy Pillow is mainly used to keep the baby sitting tall. Photograph the baby from the front. This pose will help you capture a nice head and shoulders photo of babies six months and up.
Boppy Pillow Photgraphy Pose #4: Pet Laying
Again prepare the Boppy Pillow as stated above. You will be photographing from in front of the subject so a high or low table will work. The Boppy Pillow opening should face to the left or right of the camera. Lay the pet with the front paws on the Boppy Pillow. The body should be laid into the center and if large enough out the opening. Stand behind the camera in front of the subject and get the pet to turn their head towards the camera. I use a rubber chicken, not a squeaker toy. A squeaker toy will scare most animals and usually makes a dog jump up and want to play. You only want to get the animal to look in your direction with their head.
I have included a couple of photos that show the Boppy Pillow in use.
Digital Photography Home-Business Opportunities
credit
For the next seven years, digital photography is forecasted to remain steady as a job opportunity for those that are interested in this field. While the competition is expected be strong amongst photographers and the demand for jobs will fall below the number of photographers there are expected to emerge in this field.
The most successful photographers exhibit traits in being creative, able to adapt rapidly to technology changes, and management proficiency. There are digital photography business courses available to help you gain the competitive edge. You will be able to start your own full or part-time business when you develop a good business sens and keep up-to-date on the rapidly changing technology.
There are many areas that you can pursue in a digital photography home business. I will cover a few of the areas for digital photography businesses.
Real Estate
Each year there are millions of homes sold in the US and real estate agents use at least one picture to advertise the property online, in magazines, in brochures, and in newspapers. As a digital photographer you could earn $50 to $100 a house working with real estate agents or others involved in real estate.
Portraits
There are many locations that you can use for a photo shoot. Many people like to have a professional portrait done of themselves for various reasons. The common charge for a shoot is $100 per hour and an additional $50 to $100 for prints and enlargements. There is also a strong demand for pet and children's portraits.
Sports
Being a photographer for sporting events can be profitable and exhilarating. As a sports photographer, you can submit your photos to event organizations, to participants and publications, local news agencies, and a variety of other types of news and sporting sites. The local minor league teams could pay $50 to $200 for team photos with extra sales potential for prints, premium items such as photo trading cards, T-shirts, and reprint. Do not forget your local school teams either as there is a hidden potential for a photo shoot for these teams.
Commercials
Every year there are billions of dollars spent on product advertisements. Commercial photography is normally limited to the more experienced photographers who can charges as much as $2,500 a day for high end product shots. There is also an opportunity for those that can also do shoots for the local chamber of commerce for their websites, local businesses for websites, and a wide array of other ways to earn as a commercial photographer.
Glamour
There are many beauty salons, hair dressers, and modeling agencies that use photos to help promote their services and products. While it is not uncommon for them to pay more than $150 an hour for promotional shoots with images that can be used for brochures, online advertising, point of sale materials, and business cards. There is an opportunity for those that wish to have photos of their staff and customers photographed for in house promotions or for conventions.
Stock Photography
There are agencies that specialize in stock photos that they resell to business for promotional purposes. For you to have your work listed with them they normally require a minimum submission of 300 to 500 photographs. As a stock photographer you can submit photos such as travel photos, landscape, people, animals, still life, and various other types of images that will appeal to their customers. The commissions for stock photographers can range from $5 to $100 for images that their customers purchase through their agencies.
News and Events
Many local newspapers, magazines, and newscasts often look for interesting human interest stories and pictures. The requirements for each of the types of periodicals will vary, but it is possible to have your pictures published, receive credit as a tag line, and possibly a payment for your photo.
Wedding Photography
There are photographers who will establish a wedding package of 25 to 40 prints that will retail for $1,500 to $3000. Normally this a type of shoot will take two days to work, the first day is to shoot the event and the second day is to process and prepare the album.
Graduation
There are parents who wish to have a professional photograph took of their graduate walking down the aisle and across the stage at graduation. The charges for photos could range from $5 to $10.